Create subscription from Admin
This guide will walk you through how to create a subscription manually from the Admin Awtomic app
You can manually create subscriptions directly in the Awtomic Admin app. This is useful in scenarios such as:
- Tasting rooms or in-person events where customer info is collected manually
- Customer support situations where you want to set up a subscription on behalf of a shopper
- Cases where you need to recreate or replace an existing subscription without sending the customer back to your storefront
How to Create a Subscription in the Awtomic Admin App
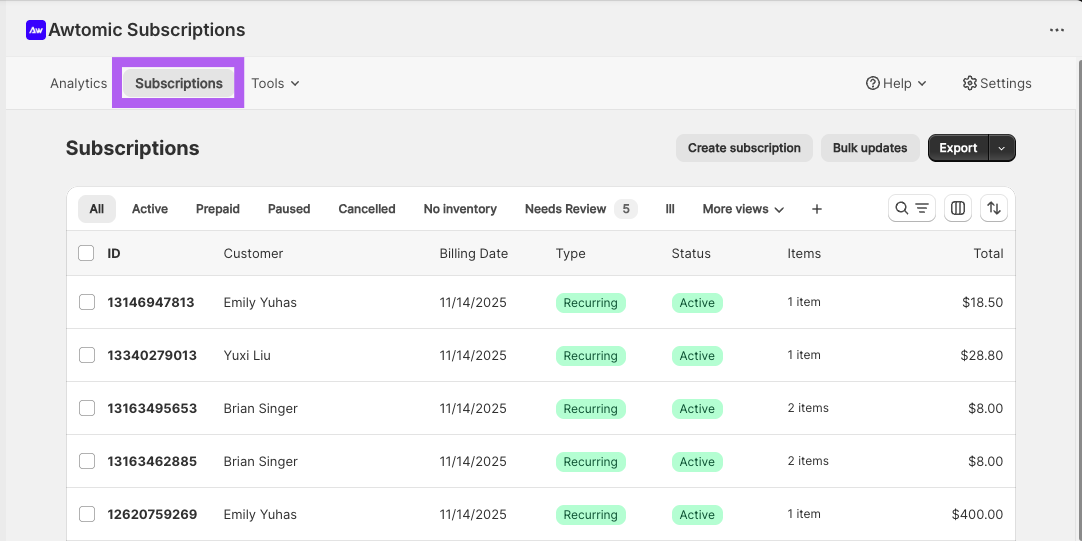
Step 1: Navigate to the Subscriptions Page
When you open the Awtomic app, you’ll land on the Subscription List page by default.
You can also reach it using the Subscriptions button in the top-left corner of the app.
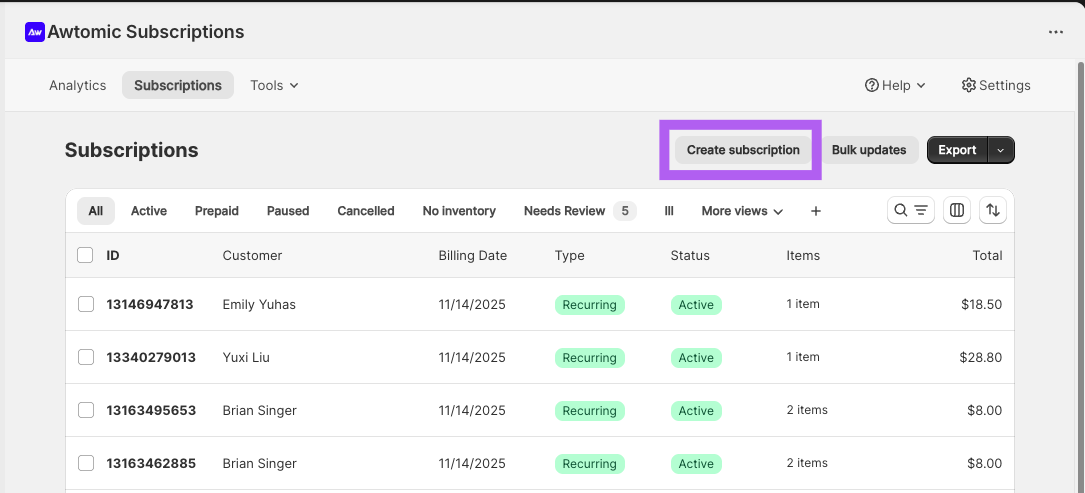
Step 2: Click Create subscription
Click the Create subscription button in the top-right corner.
Step 3: Select a Customer
Search for an existing customer or create a new one.
Important: Subscriptions are permanently tied to a customer record and cannot be transferred later.
Click Continue to move to the Create Subscription page.
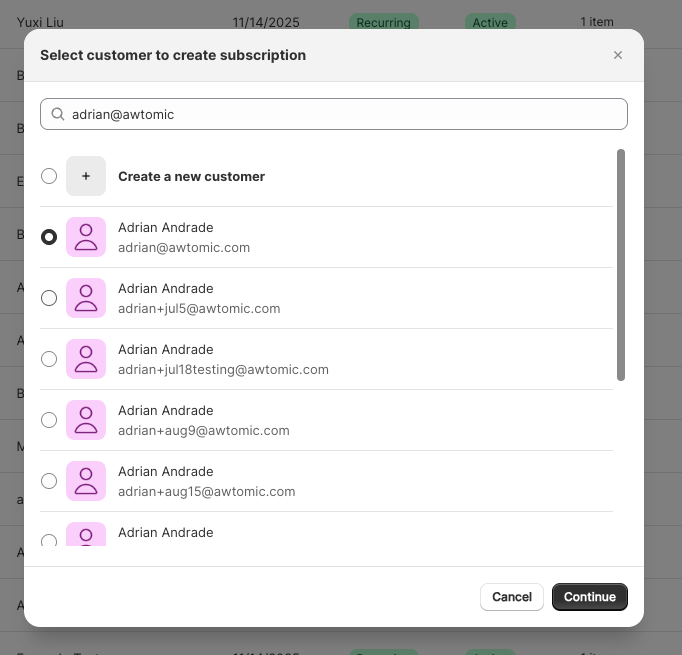
Once you select "Continue" on the popup, you'll be taken to a page titled "Create subscription" you'll notice that the customer you had previously selected is displayed at the top.
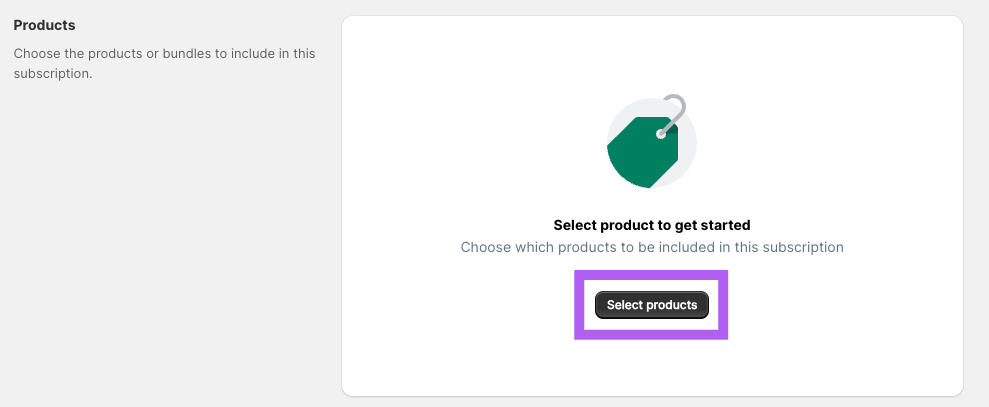
Step 4: Add Products or Bundles
Click Select products to open the selector.
You can add:
- Individual products
- Bundles
- Build-a-box SKUs
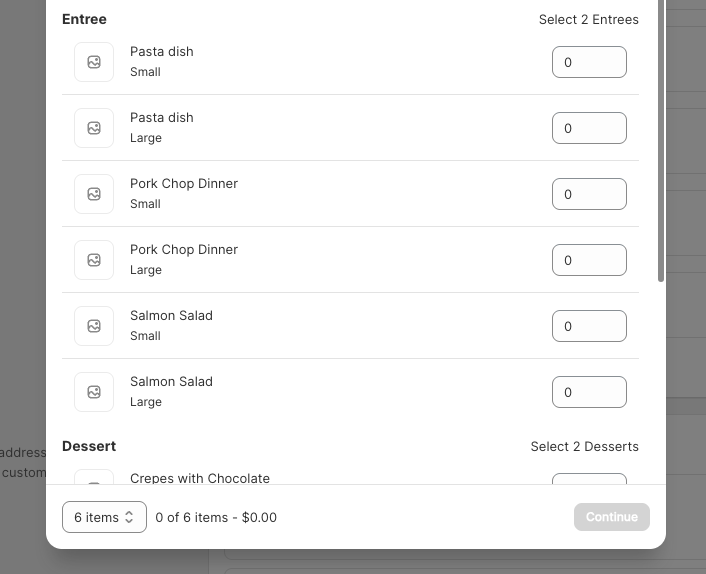
Within this popup, you should be able to select individual products or our bundles as well. Pictured below, the user has selected a 6-item bundle product.

If you select a bundle, you’ll be prompted to choose the items inside it. The selection must follow that bundle’s quantity rules.
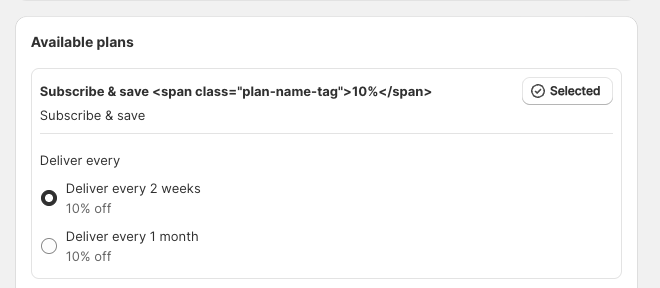
Step 5: Choose a Subscription Plan
Select the selling plan group, then choose a delivery frequency.
Any frequency-specific discounts will automatically apply.
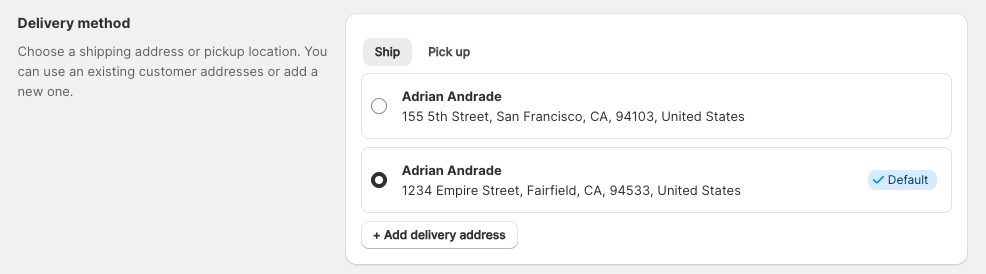
Step 6: Select a Delivery Method
Choose either:
- A shipping address, or
- A local pickup location
You can add a new address using + Add delivery address.
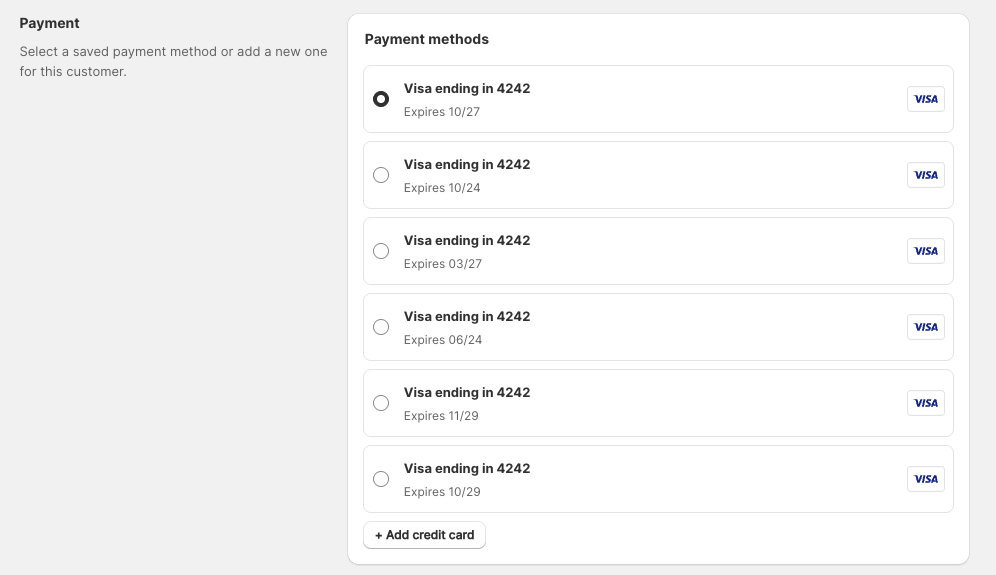
Step 7: Add a Payment Method
Select an existing payment method or click + Add credit card to add a new one.
Step 8 (Optional): Add Order Notes
Order notes will be included on all recurring orders. They are generally not visible to customers unless your workflow exposes them on packing slips or similar materials.

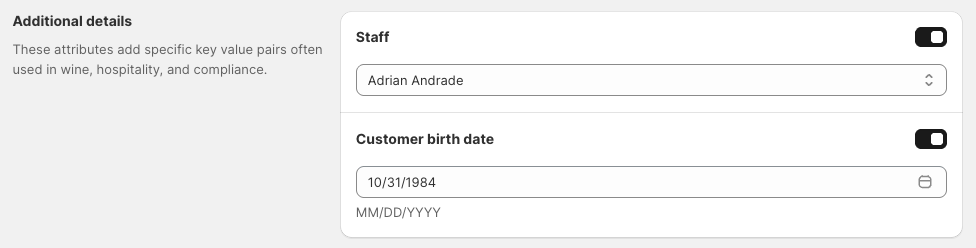
Step 9 (Optional): Add Staff or Customer Birth Date Attributes
These only appear if your store uses:
- Awtomic POS extensions
- Alcohol compliance tools like ShipCompliant or Avalara
If these should appear but don’t, contact [email protected].
When enabled:
- Attributes are stored on the subscription contract
- They are applied to all future recurring orders
- They remain invisible to customers
Step 10: Review & Create Subscription
Subscription Summary
Review the cost details. Bundle-based discounts are applied automatically, and you can add custom discount codes if needed.
Note: Taxes are not displayed because Shopify or external tax processors calculate taxes when the order is created.
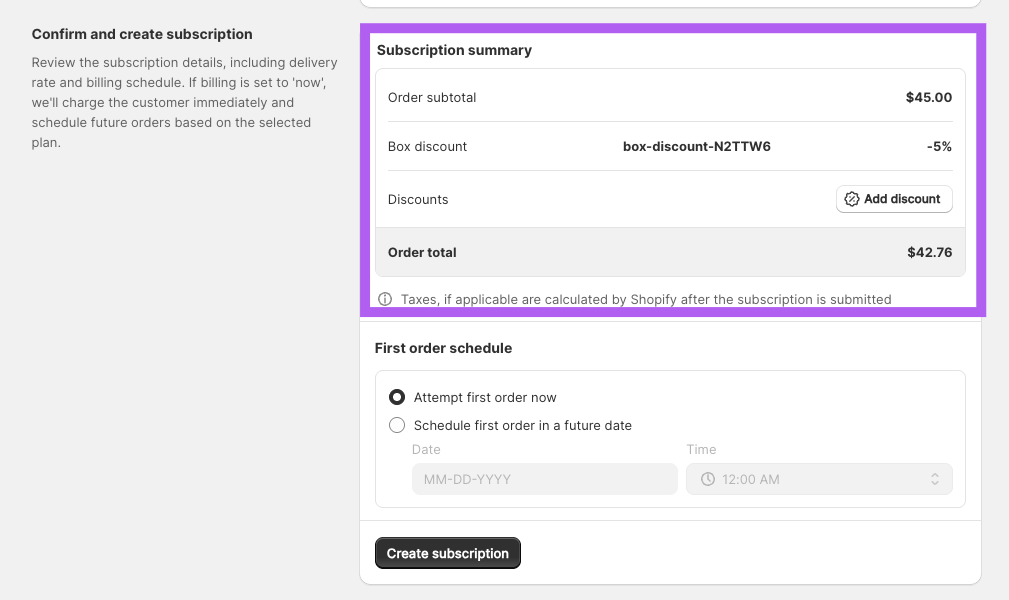
First Order Schedule
Choose whether to:
- Run the first order immediately, or
- Schedule it for a future date
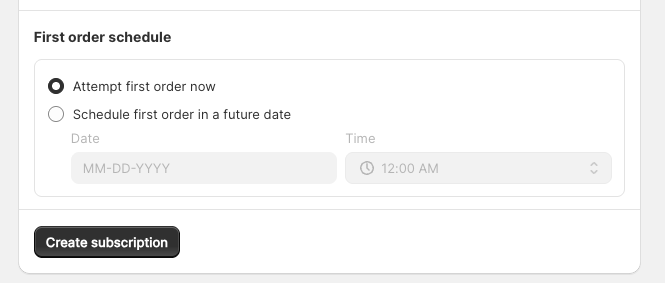
Click Create Subscription when you're ready.
If an error occurs, the page will show the message returned by Awtomic or Shopify.
After Submitting the Subscription
You’ll return to the Subscription List page. While the subscription is being created in Shopify:
The subscription will show a loading status
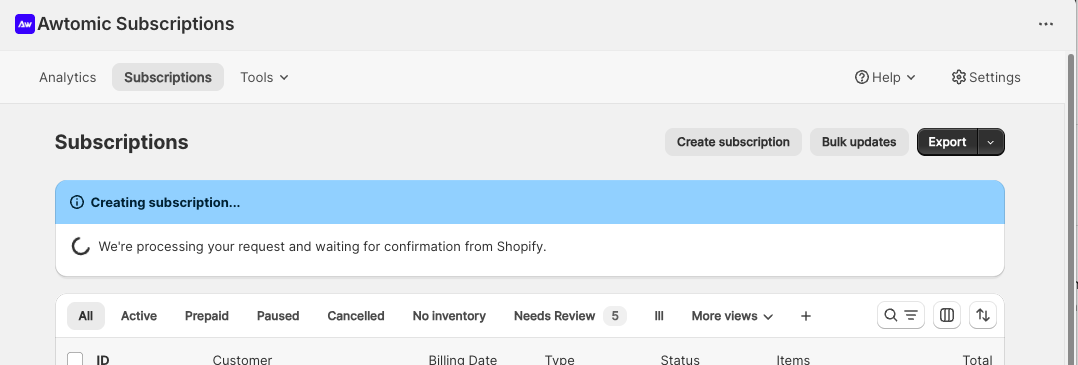
A success banner will appear once complete, with links to the subscription and first order.

Note: If you click “See subscription” too quickly, the contract may not have finished creating in Shopify. Refreshing the page usually resolves this.
Updated 8 months ago