Getting Started with Awtomic Setup
How to set up, preview and launch your subscriptions
Our Welcome guide page in the app will walk you through all the critical and optional steps that you need to take in order to have the best setup for your subscriptions. We'll go into more detail here on each section and why it's important. See our Troubleshooting setup article if the steps here are not working for you. Shopify, while powerful and flexible is extremely complex and different themes and apps may result in a few extra steps to get things working smoothly.
Step 1: Setting up your first Subscription Plan
Before you get started with installation, we recommend you create your first subscription plan. This is important so you can preview it on a product and make sure everything is working. You can edit this plan later, so don't worry about making it perfect the first time. Make sure you assign it to at least one product. Nothing will change on your live site until you press "Make Public" as the final step in this guide, so don't worry about disrupting your customer experience as you get set up. You can do this by going to the Subscription Plans section, or pressing the link from the Welcome guide:

If you want to spend more time getting your first subscription plan set up, check out our help center for details on how to create subscription plans.
Step 2: Enabling Customer Accounts
A critical step before launching your subscriptions is to enable customer accounts for your store. If you don’t do this, then customers will not be able to log in and self-manage their subscriptions. Enabling customers to self-manage their subscriptions will save you a lot of customer support time, and will make customers happier and less likely to churn in the long run.
To do this:
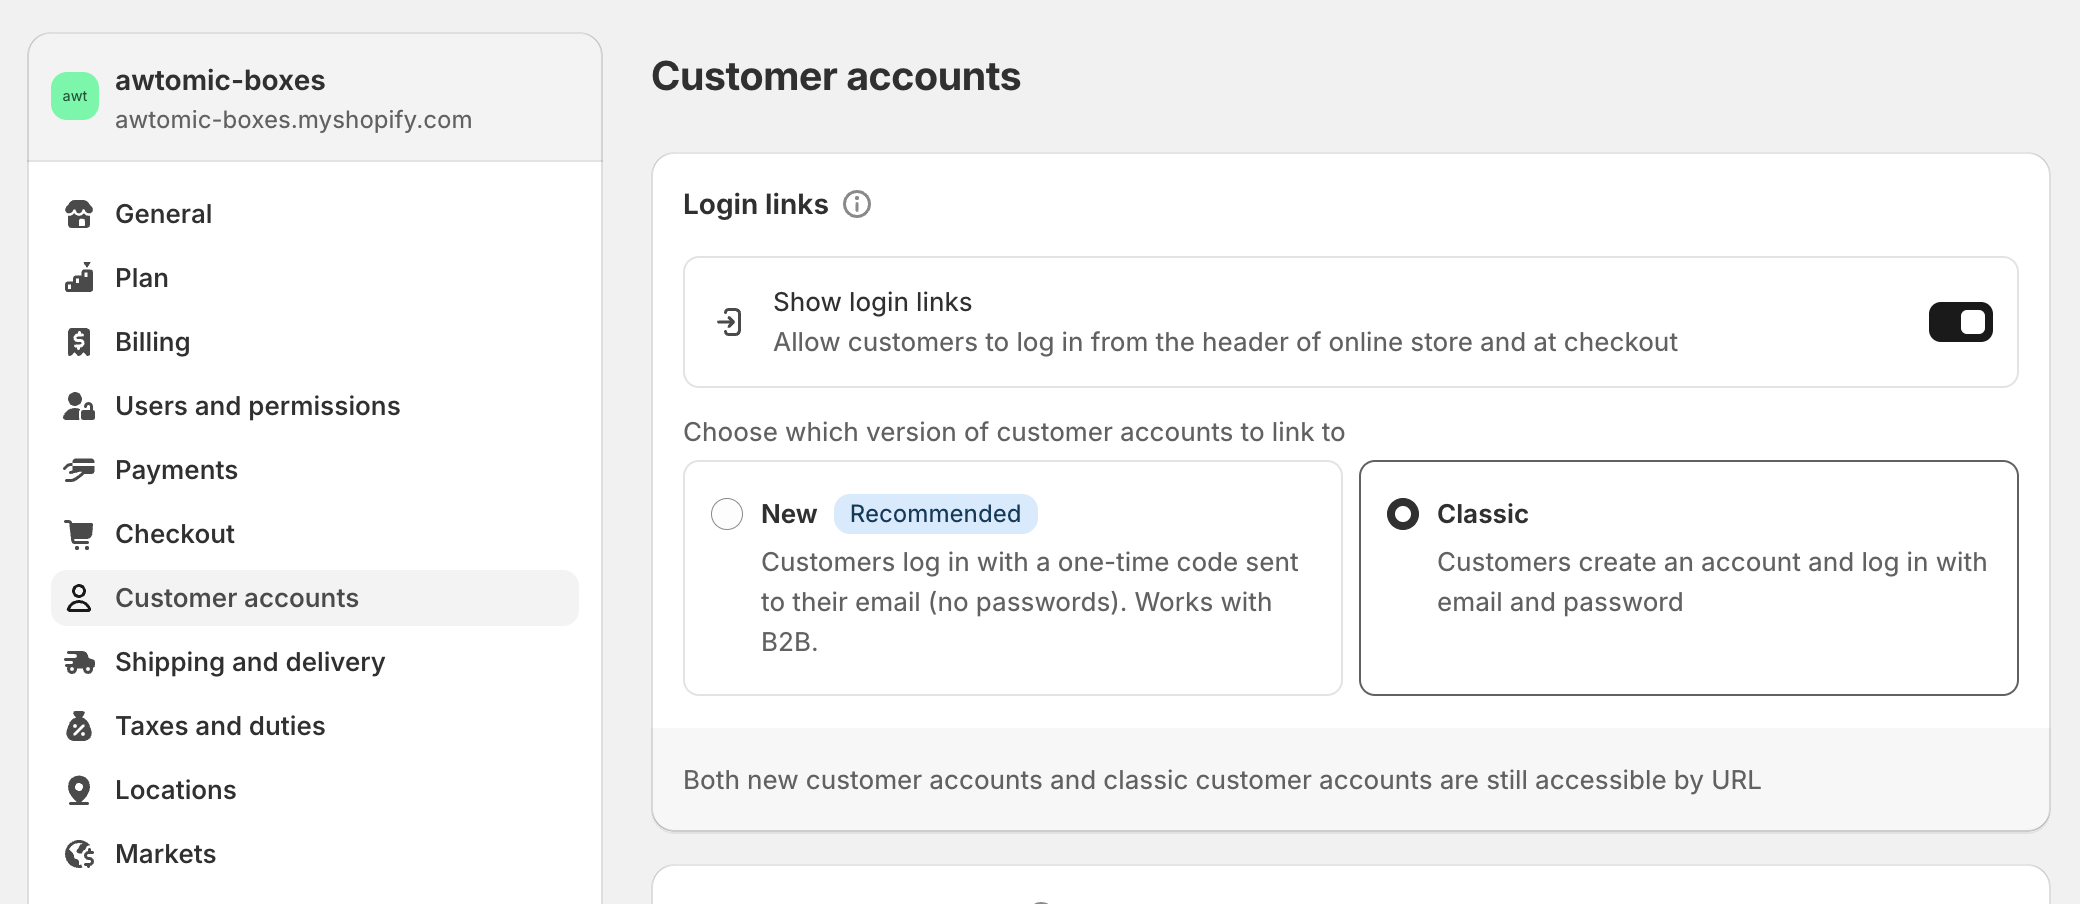
- Navigate to the Customer accounts settings
- Enable “Show login links“
- Select “Classic” customer accounts for the type.

Please verify that they are working before you take the final step to launch subscriptions. You can do this by going to your online store and finding a profile type icon, which should take you to a login page. Customer accounts are already set up and fully managed by Shopify so you do not need to do anything else one they’re enabled.
Step 3: Adding labels to your card, orders and for Account Management
Most of Awomatic's interfaces are loaded automatically for you, but there are a few places in your theme that you will need to add references so that users can access critical pages or view important information.
The most important one is a link to the subscription Account Management section for your customers. Without this link, they will not be able to self-manage their subscriptions.
Now that you've enabled customer accounts, you should have some default Shopify files in your theme, including: templates/customers/account.liquid . To add the subscription management link:
-
go to Online Store in the left hand nav of Shopify
-
Click the "Actions" dropdown on the current theme
-
Press 'Edit Code'
-
In the "Templates" section, find the file named customers/account.liquid (this may have a different name if you have a custom theme - ask your theme developer or look for a file with a similar name to "account")
-
add the code snippet in this file - It usually works well above the Orders table title, which will look something like this
<h2>#{{ 'customer.orders.title' | t }}</h2>Although you can put it anywhere you'd like. It will show up as a button, but can be styled to match your aesthetic.
Here's the snippet to add:
<h2>Subscriptions<h2><a class="btn btn--small" href="/tools/bundle-subscriptions">Manage Subscriptions</a> Lastly, depending on your theme, you may need to add a reference to your cart and orders table to show the frequency of the subscription. This is a great way to visually confirm to customers that they are purchasing (or have purchased) a subscription and not just a one-time product. Some themes already do this, so it may help to check and then come back to this step, or you can add it in and remove it if it's duplicative. If you have a slide out cart or a few different cart layouts, you may have to add this to multiple files.
Similar to the steps above:
-
Go to Online Store in the left hand nav of Shopify
-
Click the "Actions" dropdown on the current theme
-
Press 'Edit Code'
-
Find the cart template, usually its the sections/cart-template.liquid or templates/cart.liquid.
-
Put the following snippet where you want or if you don't know paste it BEFORE the
{% assign property_size = ... %}block{% unless item.selling_plan_allocation == nil %}#{{ item.selling_plan_allocation.selling_plan.name }}{% endunless %}
And for orders:
-
Find the order template, usually its the templates/customers/order.liquid.
-
Put the following snippet where you want or if you don't know paste it right AFTER the
<div class="item-props">opening tag{% unless line_item.selling_plan_allocation == nil %}#{{ line_item.selling_plan_allocation.selling_plan.name }}{% endunless %}
Step 4: Take a look at your subscription settings
Details around all of the available settings are outlined in our help center here. You can always edit them later or come back to this step, but it may help to set things up the way you want them before doing any detailed testing.
Now that you've finished basic setup, take a look at our article on Previewing and Testing your setup.
For advanced setup steps, take a look at our detailed sections on:
Updated 5 months ago
